
Build times in C++ and how to speed them up

In this article, I will provide a quick overview of the steps involved in a C++ build process and how the choice of appropriate tools can speed it up.
The more substantial a project is, the longer builds take. The cause is typically the sheer amount of files that need to be processed. Also, the number of additional libraries that need to be linked and or built is generally more extensive. On top of that, interdependencies grow, resulting in longer incremental builds afterward.
The result is a frustrated developer wasting vast amounts of time and money instead of being more productive. Therefore, build times rank somewhere on the top of my list of the most annoying things in software-engineering.
To give you a better idea about what’s happening during the build process, let’s look at the three main steps involved:
- Preprocessing
- Compiling
- Linking
Of course, each step is optimizable. For example, if you see that the linker takes too much time, you could try out a different linker. There are multiple good options, such as Gold, LLD, or others. However, what I have found to be the easiest way to increase the build speed, is making the right choice when it comes to the build system/build automation tools.
The CMake build system
I prefer CMake as my primary build system because the amount of customizations you can apply is incredible. Also, all modern Integrated Development Environments (IDEs) offer sufficient up to seamless integration. In the worst case, all you have to do is install a plugin. Apart from CMake being open-source and cross-platform, it is also actively under development by Kitware and contributors.
From the official Website:
CMake is an open-source, cross-platform family of tools designed to build, test, and package software.
CMake is used to control the software compilation process using simple platform and compiler independent configuration files and generate native makefiles and workspaces that can be used in the compiler environment of your choice. The suite of CMake tools were created by Kitware in response to the need for a powerful, cross-platform build environment for open-source projects such as ITK and VTK.
With Qt deciding to use it as their build system for Qt 6, another big project is now on board. As a result, support in Qt Creator is getting extended.
From the Technical Vision for Qt 6 post:
QMake as the build system used in Qt 5 has lots of quirks and limitations. For Qt 6, we aim to use CMake as a standard 3rd party build system to build Qt itself. CMake is by far the most widely used build system in the C++ world, and better integration with it is sorely needed. We will continue to support our users on QMake, but not develop it further or use it to build the Qt framework itself.
To build your project, though, you have to choose a generator. Generators are taking care of writing input files for a native build system. For example, on Unix systems, you could decide to generate Unix Makefiles and then run make to build.
While I don’t have any bones to pick with this setup, as it is pretty fast, I can’t say the same about NMake Makefiles on Windows. So far, out of all the tools I have used, NMake still gives me nightmares. To clarify, on some projects, I had to wait around 40 minutes for a clean build to finish. However, the worst of it was the average time for incremental builds of about 5 minutes. And so I chose to investigate whether I could speed this up.
Since I am working a lot with Qt, I decided to try NMake Makefiles JOM with the corresponding JOM call. JOM is an NMake clone with the ability to run commands in parallel. As with make, you can specify the number of jobs you want to spawn (“-j JOBS” e.g. “-j 8”). With this setup, I managed to reduce the clean build time to around 20 minutes. Incremental builds only took an average of 2 minutes. While the result was a massive improvement, it still wasn’t a cause to celebrate. Consequently, it was time to give the Ninja Generator a shot.
What is the Ninja build system?
From the Ninja manual:
Ninja is yet another build system. It takes as input the interdependencies of files (typically source code and output executables) and orchestrates building them, quickly.
Ninja joins a sea of other build systems. Its distinguishing goal is to be fast. It is born from my work on the Chromium browser project, which has over 30,000 source files and whose other build systems (including one built from custom non-recursive Makefiles) would take ten seconds to start building after changing one file. Ninja is under a second.
While this sounds good on paper (even a bit too good), I remained skeptical. And so I made the necessary changes to my CMake calls and started a clean build.
The first thing I noticed was the build output started flying by. So much so that I checked again whether I was doing a clean build. To my surprise, the process continued to be that fast throughout the entire build. The result was a time of under 10 minutes.
Then I started developing to test the incremental build times. For changes that had hardly any dependencies, I ended up under 10 seconds. More profound changes were way under a minute. As a result, I can test my changes more frequently without wasting vast amounts of time and being frustrated.
How to Ninja your builds
To get started using Ninja with CMake, you first have to decide whether to download, install, or build it from scratch.
For the installation via a system package manager use:
- ArchLinuxCopy to Clipboard
- Debian/UbuntuCopy to Clipboard
- HomeBrewCopy to Clipboard
- FreeBSDCopy to Clipboard
- ChocolateyCopy to Clipboard
- You can find additional options on the GitHub page.
- ArchLinux
To build Ninja, follow these instructions.
Downloads are usually available for Linux, macOS, and Windows. Go to releases to find a suitable version for you.
By now, the Maintenance Tool from Qt also offers Ninja as a download option.
Once you have obtained Ninja, all you have to do is execute the following command in a shell in the build folder:
In case you haven’t created a build folder yet, go to your source folder and execute the following lines to create the folder and start building:
This is what the resulting compilation output looks like:
Configuring the CMake generator in different IDEs
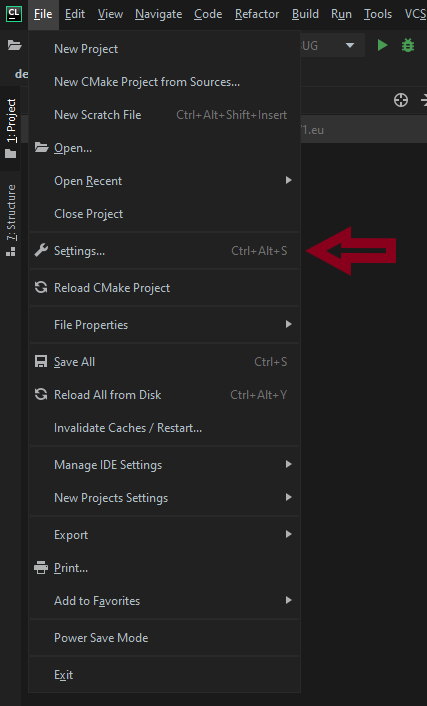
Since CLion version 2019.3, you can pass the “-G” option to choose a custom generator for CMake. Open your project and navigate to File > Settings (Ctrl + Alt + S).
Now expand Build, Execution, Deployment, and select CMake.
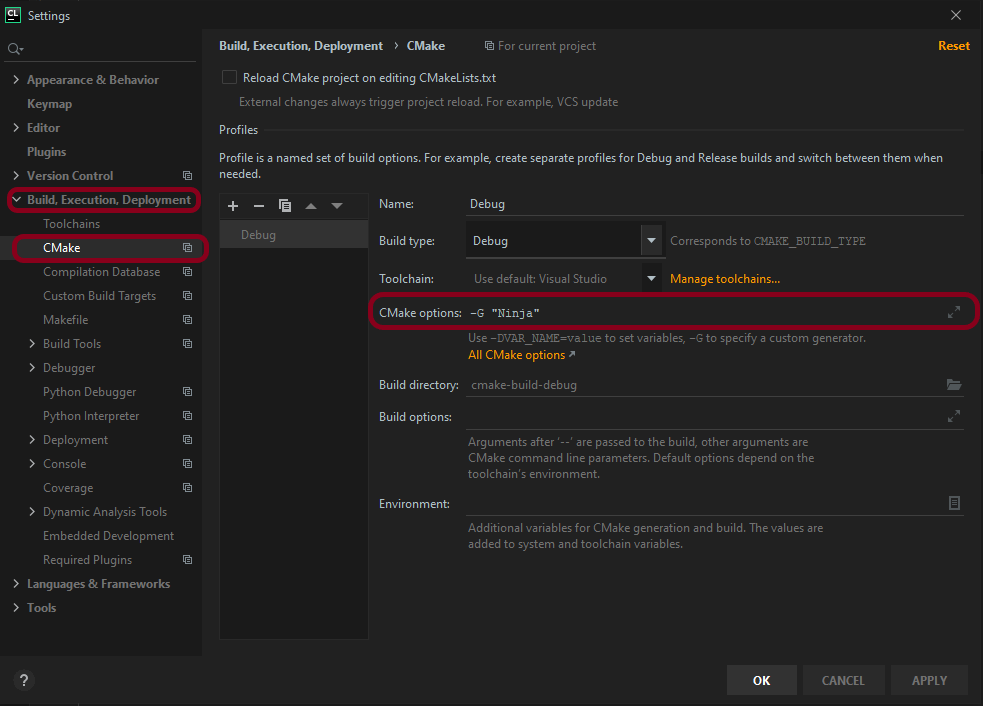
There you can see the CMake options input field. Change the call to:
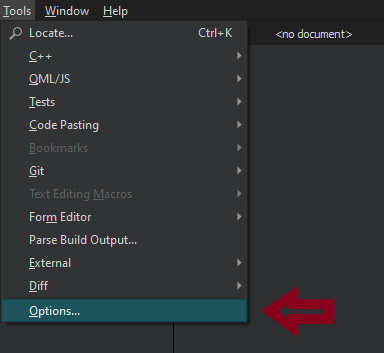
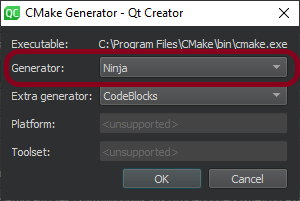
To set up Qt Creator go to Tools > Options.
Now navigate to the Kits > Kits tab.
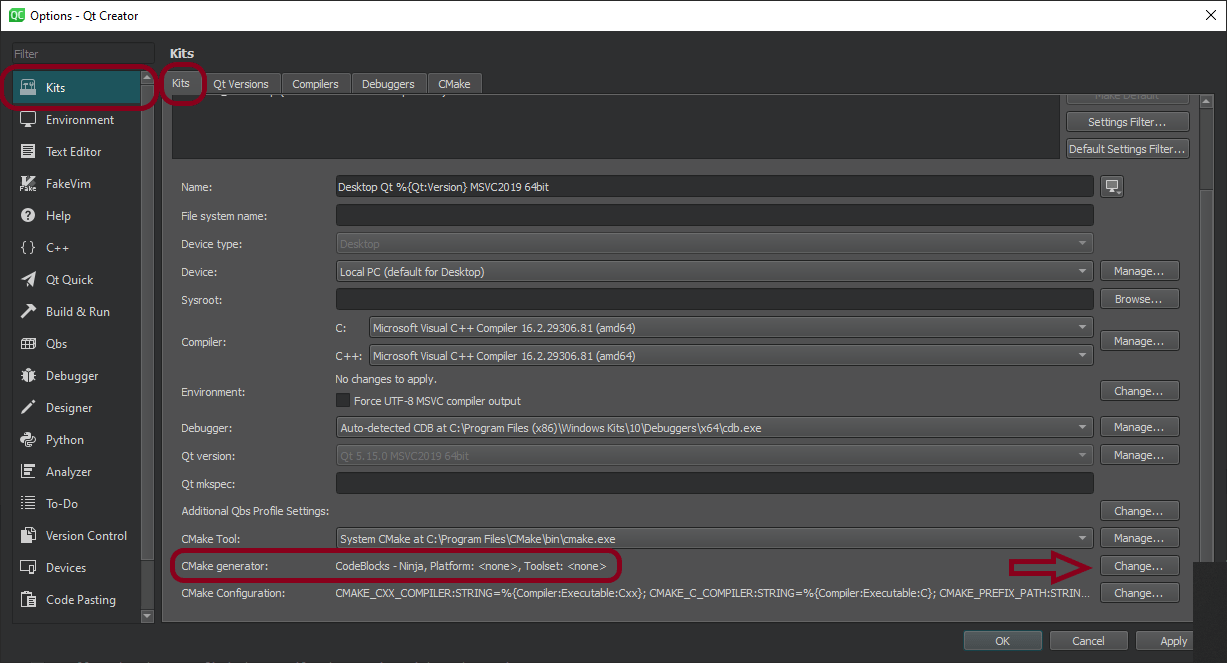
Then select your kit, and at the bottom of the page where it says CMake generator, press Change. In the newly opened popup, select Ninja as Generator from the drop-down field.
CMake support for Ninja is available in Visual Studio since 2017 15.3.
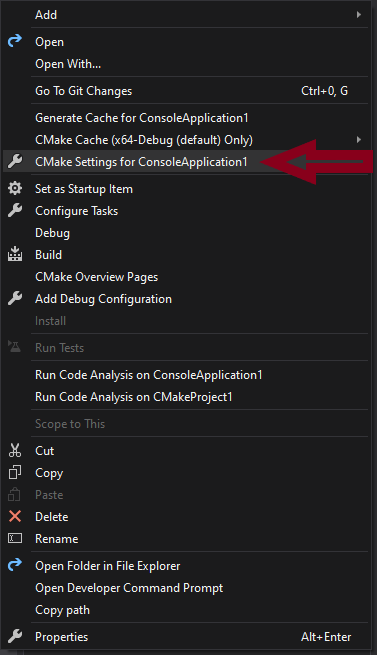
To enable it, first open your solution. Then find your CMakeLists.txt in the Solution Explorer and right-click it.
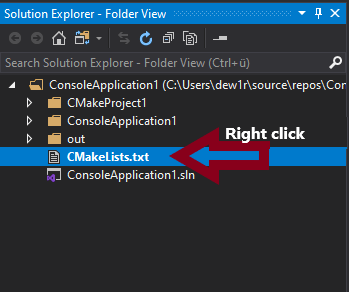
Next, click on CMake Settings for YourProjectName.
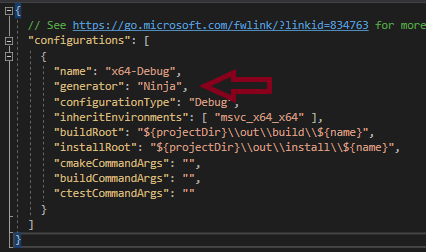
Now you can see a window showing your configuration. On the right side of it, click the Edit JSON link.
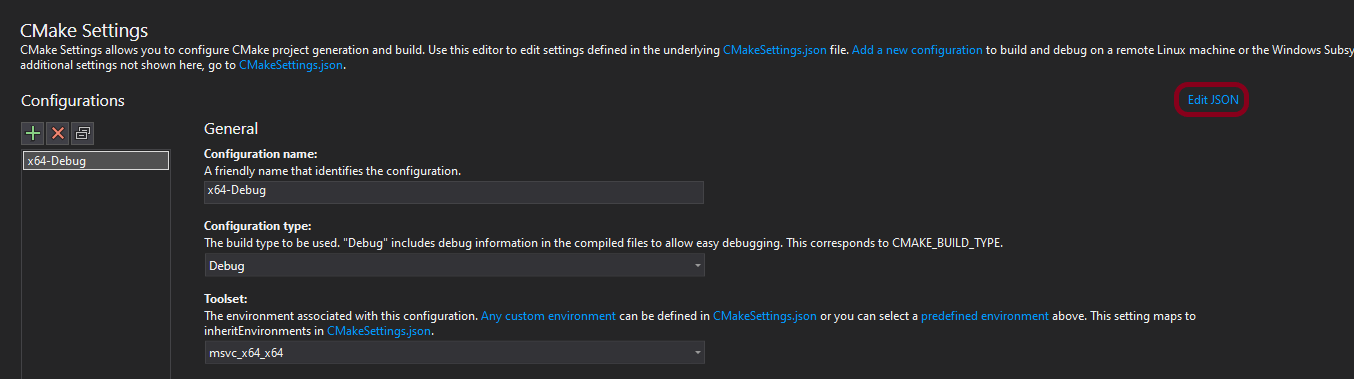
At last, change the generator line to
Summary
I am not trying to advertise that CMake with Ninja is the best setup out there. You may or may not produce better results with other tools. Instead, take this article as a way of thinking about reducing difficulties surrounding your projects. In conclusion, use all means available to you to speed up your C++ builds and minimize unnecessary stress and frustration!

